Configuration Studio
The Configuration Studio is the single place where you build and manage everything that is configured in a Shesha application, rather than written in code. Forms, entities, reference lists, roles, permissions, settings, and notifications are all created and edited here. In earlier versions each of these had its own separate admin screen. The Studio brings them together into one workspace, so you no longer move between different screens to get work done.
If you are new to Shesha, think of the Configuration Studio as the control room for your application's configuration. Almost everything you set up without writing code starts here.
The Studio runs as a full-page application at its own address, /configuration-studio, and opens in its own browser tab, separate from the Admin Portal. This gives you a focused workspace dedicated to building and maintaining configuration.
A few ideas to know first
The Studio will make much more sense once you understand four core ideas. Each one is covered in more depth elsewhere in the docs, and is linked below.
| Idea | What it means |
|---|---|
| Configuration item | Any building block you set up through configuration instead of code, such as a form or a reference list. Items are stored as data and can be moved between environments. See Configuration. |
| Module | A named container that groups related configuration items together. Every item belongs to exactly one module. See Shesha Modules. |
| Revision | A saved snapshot of an item. The Studio records revisions automatically every time you save, so you always have a history to look back on. |
| Expose | The way you bring an item that came from a base module into your own module so you can safely customise it. See Expose and module hierarchy. |
What you can manage
The Studio handles all the standard configuration item types in one tree:
- Forms
- Entities
- Reference Lists
- Roles
- Permission Definitions
- Setting Configurations
- Notification Types
- Notification Channels
Each type has its own designer that opens inside the Studio when you edit an item of that type.
How the workspace is laid out
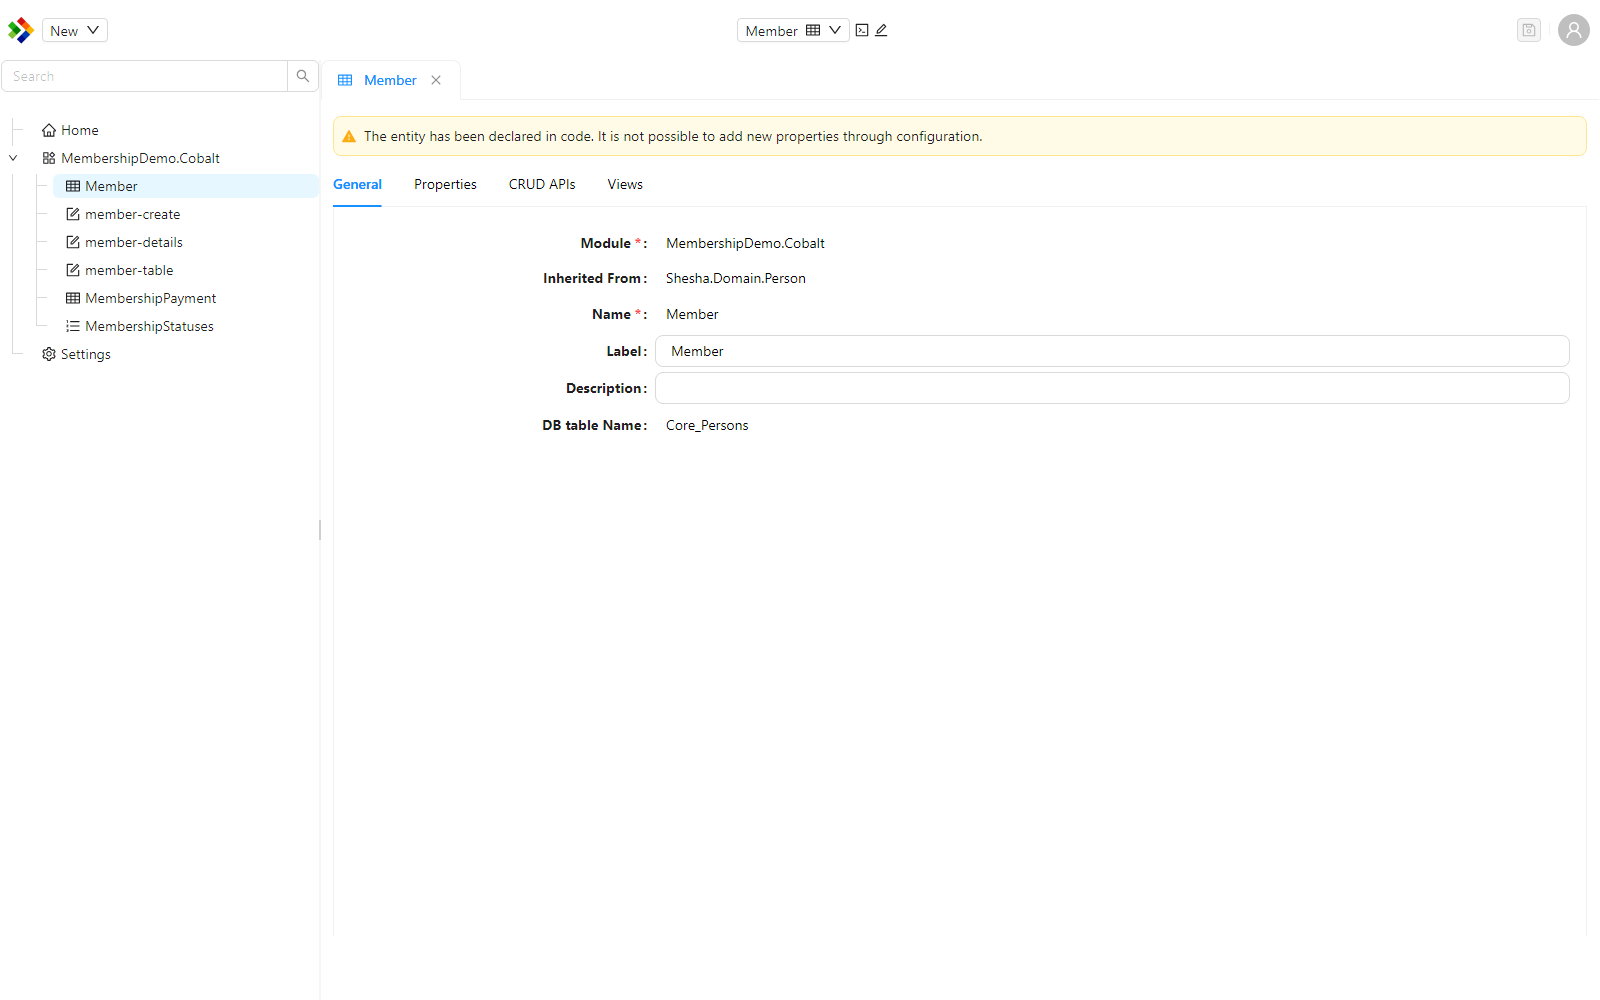
The Studio is built around three areas that work together.
| Area | What it does |
|---|---|
| Solution Explorer | The tree on the left. It organises every configuration item by the module it belongs to, and is where you browse, search, and create items. See Solution Explorer. |
| Work Area | The main area on the right, where items open for editing. Several items can be open at once, each in its own tab. See Editing items. |
| Toolbar | The bar across the top. It lets you create new items and act on the item you are currently working on. The toolbar mirrors the actions available when you right-click an item in the tree. |
A typical session looks like this: you find an item in the Solution Explorer, open it in the Work Area, make your changes, and save. The Studio records a new revision behind the scenes, so there is no separate step to publish your work.
Versioning is automatic
You do not manage versions by hand. Each time you save an item, the Studio records a revision for you. The older Draft -> Save as Ready -> Publish lifecycle used in previous versions has been removed, so there is no manual step to mark an item as ready or to publish it before it can be used. You can review the saved revisions of any item at any time. This is explained in Editing items.
Moving configuration between environments
Configuration items can be packaged and moved between environments straight from the Studio, for example from a development environment to test or production. When you import a package, the Studio first shows you a preview of what each item will do before anything is applied, so you can check the impact before committing. See Importing and exporting.
Where to go next
- Solution Explorer - browse, search, and create configuration items.
- Editing items - work across multiple items in tabs and use automatic versioning.
- Importing and exporting - move configuration between environments safely.
- Expose and module hierarchy - customise items inherited from base modules.
- Configuration - the wider picture of how configuration is stored and deployed.