Adding New Entities and Child Tables
This step shows how to add a brand-new entity (not just an extension of an existing one) and wire it up as a child table on the parent's details view. You will create a MembershipPayment entity that tracks all payments related to a Member, and surface those payments inline on the member details view.
This is the most common shape for "one-to-many" relationships in Shesha: a child entity with a foreign key back to the parent, and a child table on the parent's details view that supports inline editing.
Create the MembershipPayment Entity
Open the backend/Shesha.Membership.sln solution in Visual Studio 2022.
1. Add the Entity Class
- Navigate to
Shesha.Membership.Domain > Domain. - Right-click the folder and choose Add > Class.
- Name the class
MembershipPayment.cs.
Example - The MembershipPayment entity:
using Abp.Domain.Entities.Auditing;
using Shesha.Domain.Attributes;
using System;

namespace Shesha.Membership.Domain.Domain
{
    /// <summary>
    /// A payment made by a Member towards their membership.
    /// </summary>
    [Entity(TypeShortAlias = "Mem.MembershipPayment")]
    public class MembershipPayment : FullAuditedEntity<Guid>
    {
        /// <summary>
        /// The Member who made the payment.
        /// </summary>
        public virtual Member Member { get; set; }

        /// <summary>
        /// The amount paid.
        /// </summary>
        public virtual double Amount { get; set; }

        /// <summary>
        /// The date the payment was made.
        /// </summary>
        public virtual DateTime? PaymentDate { get; set; }
    }
}
FullAuditedEntity<Guid> is an Abp base class that gives the entity a Guid primary key plus standard audit columns: CreatedBy, CreationTime, LastModifiedBy, LastModificationTime, IsDeleted, DeleterUserId, and DeletionTime. Use it whenever you need full audit history with soft-delete behaviour.
2. Create the Migration
- Navigate to
Shesha.Membership.Domain > Migrations. - Right-click the folder and choose Add > Class.
- Name the class with a timestamp, for example
M20231124090300.cs.
Example - Migration creating the Mem_MembershipPayments table:
using FluentMigrator;
using Shesha.FluentMigrator;
using System;

namespace Shesha.Membership.Domain.Migrations
{
    [Migration(20231124090300)]
    public class M20231124090300 : Migration
    {
        public override void Up()
        {
            Create.Table("Mem_MembershipPayments")
                .WithIdAsGuid()
                .WithFullAuditColumns()
                .WithForeignKeyColumn("MemberId", "Core_Persons").Nullable()
                .WithColumn("Amount").AsDouble().Nullable()
                .WithColumn("PaymentDate").AsDateTime().Nullable();
        }

        public override void Down()
        {
            throw new NotImplementedException();
        }
    }
}
WithIdAsGuid adds a Guid primary key. WithFullAuditColumns adds the audit columns that match FullAuditedEntity<Guid>. WithForeignKeyColumn creates a column and its foreign key in a single call. These helpers come from Shesha.FluentMigrator. For more options see the FluentMigrator docs.
- Start the application (Debug > Start Debugging or F5).
- The app opens on the Swagger page.
- Search for MembershipPayment in Swagger to see the auto-generated CRUD endpoints.
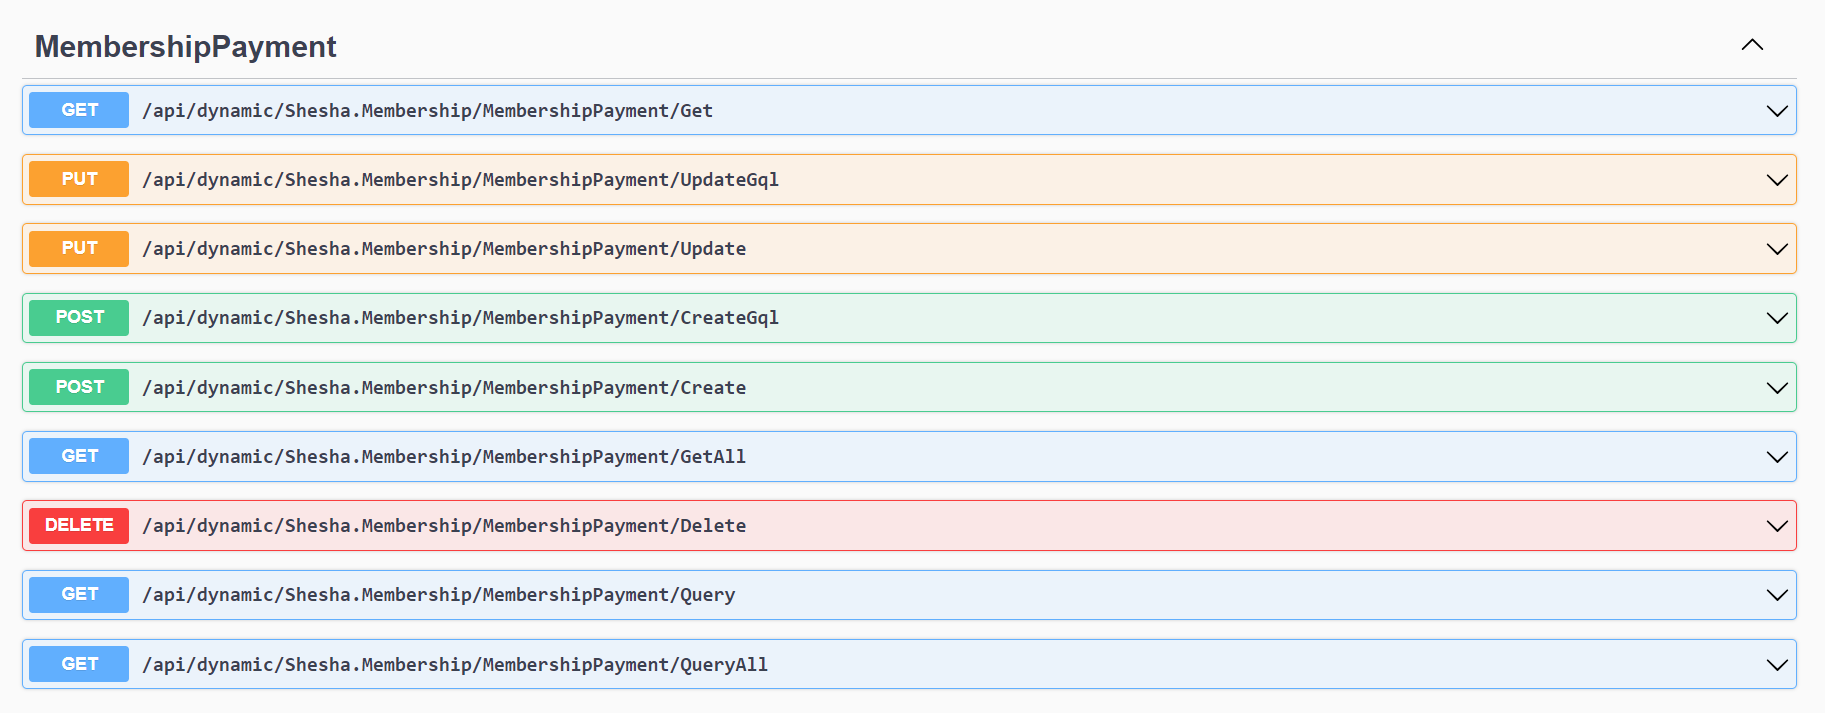
See CRUD APIs for what each endpoint does and how to customise the generated set.
Wire the Child Table into the Details View
Now surface the payments inline on the member's details view, with a filter so each member only sees their own payments.
1. Add a DataTable Context
- Open the member-details form designer.
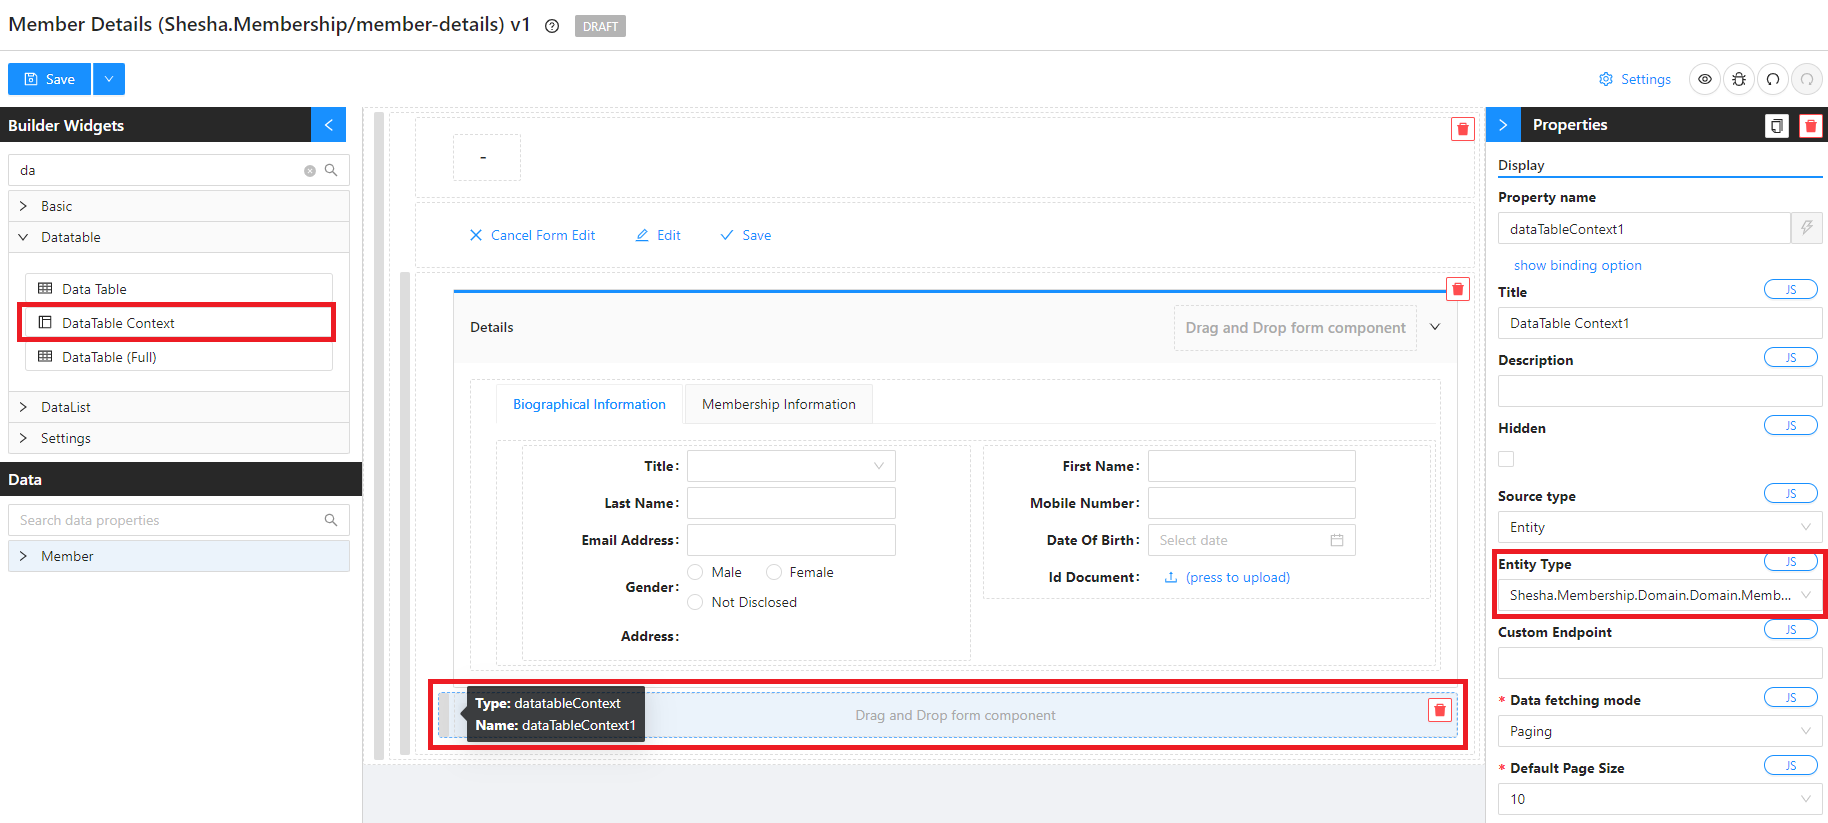
- Drag a DataTable Context (see the DataTable Context reference) onto the form, below the existing details panel.
- Set its Entity Type to the new
MembershipPaymententity.
2. Add a Panel and DataTable
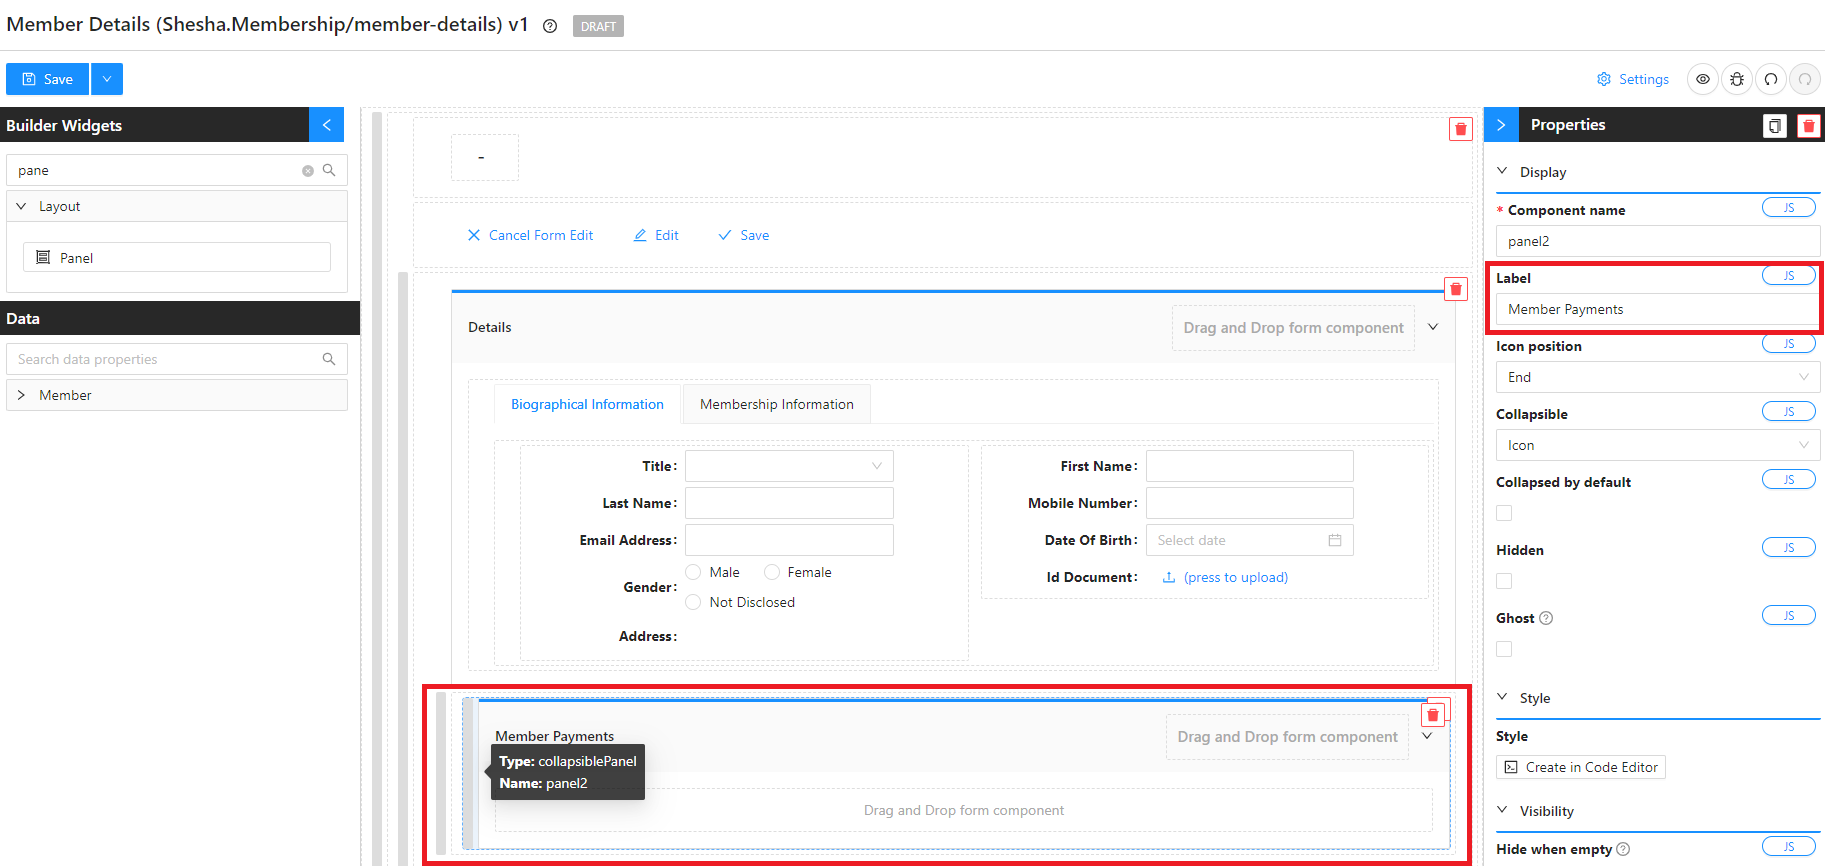
- Drag a Panel (see the Panel reference) onto the DataTable Context.
- Label the panel
Member Payments.
- Drag a DataTable (see the DataTable reference) onto the panel.
- Configure the columns:
| Type | Property Name | Caption | Create Component |
|---|---|---|---|
CRUD Operations | N/A | (leave empty) | N/A |
Data | amount | Amount | Number Field |
Data | paymentDate | Payment Date | Date Field |
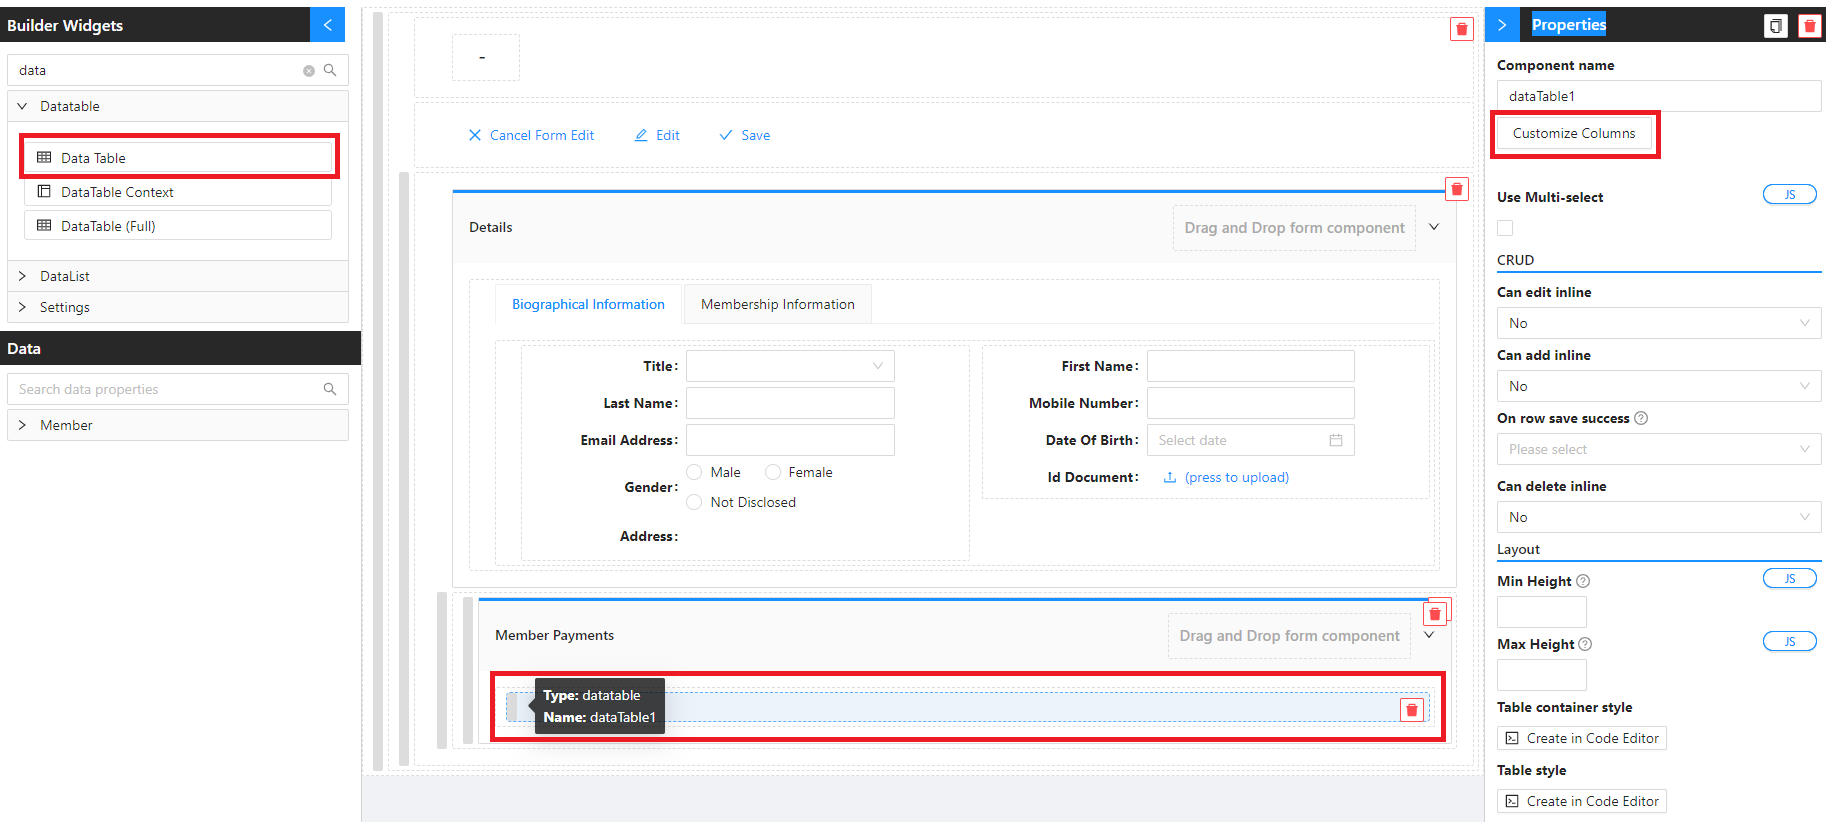
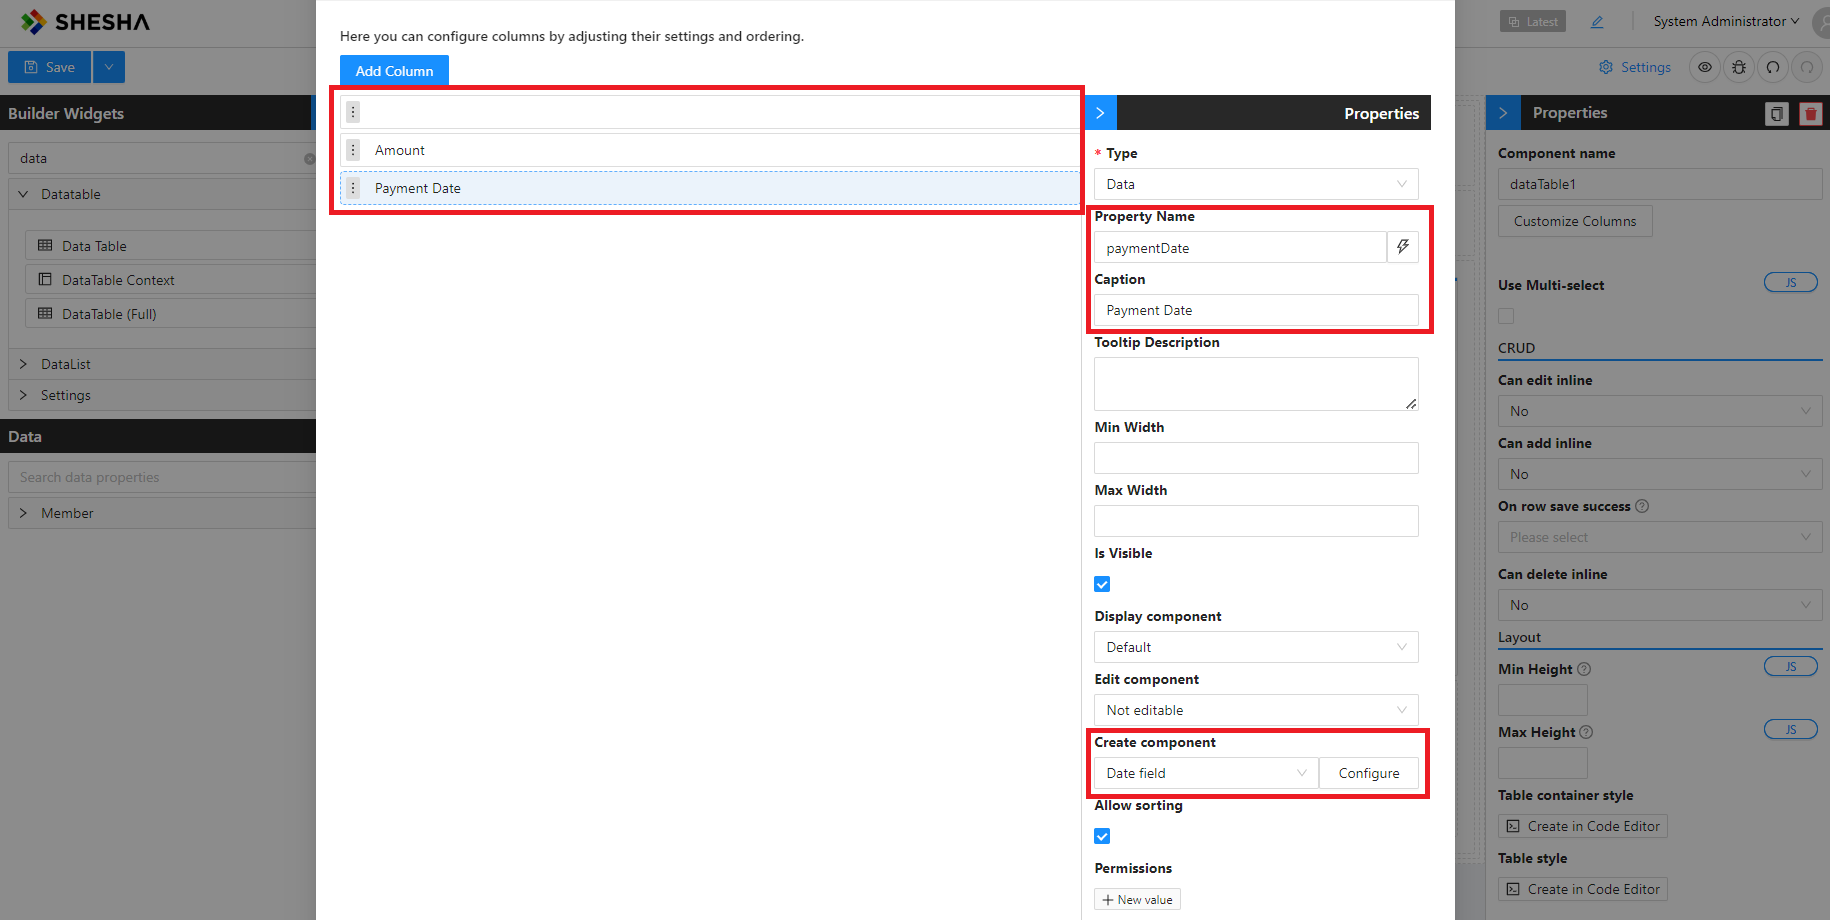
- Click Save on the Configure Columns modal.
3. Enable Inline Editing
Inline editing lets users add payments directly into the table without opening a separate dialog. See the inline editing how-to for the full flow.
Configure the DataTable:
| Setting | Value |
|---|---|
Can add inline | Yes |
Form type to use: Configured on a DataTable inside a member-details (details view) form.
Example - New row initialiser that links each payment to the current member:
return {
  member: form.data.id,
};
This sets the member foreign key on each new payment row to the currently displayed member.
4. Add Toolbar Components
To make the table easier to use, drag the following onto the Member Payments panel header:
| Component | Purpose |
|---|---|
| Quick Search | Free-text filter across columns. |
| Table Pager | Paging controls. |
| Table View Selector | Switches between named filters. |
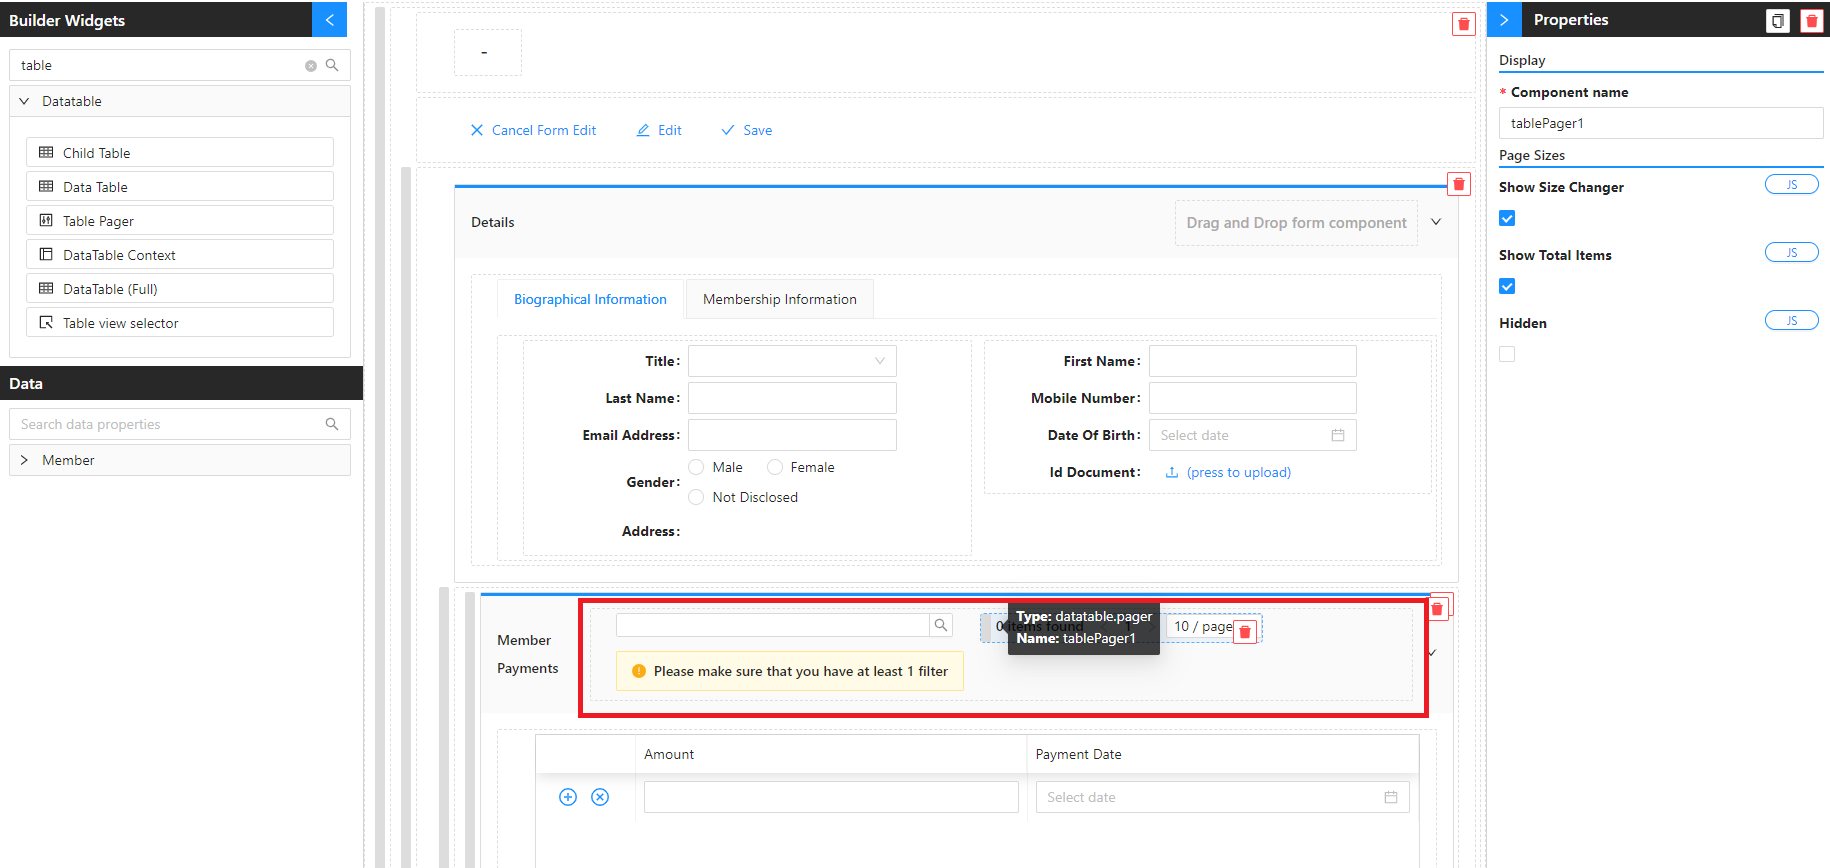
5. Filter Payments to the Current Member
Select the Table View Selector and configure a filter that restricts the table to payments belonging to the current member:
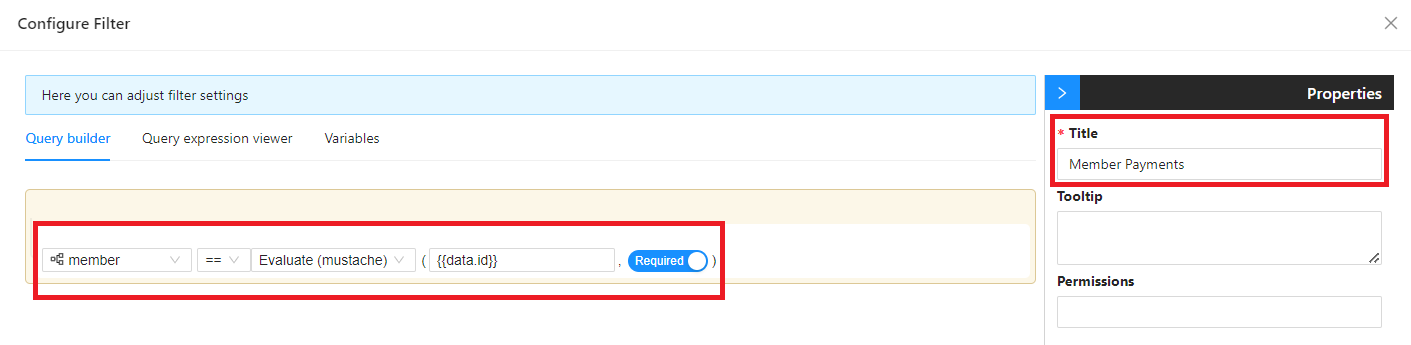
Save the filter and set the Table View Selector's Hidden property to true - users don't need to see it, but the filter still applies.

- Save the form.
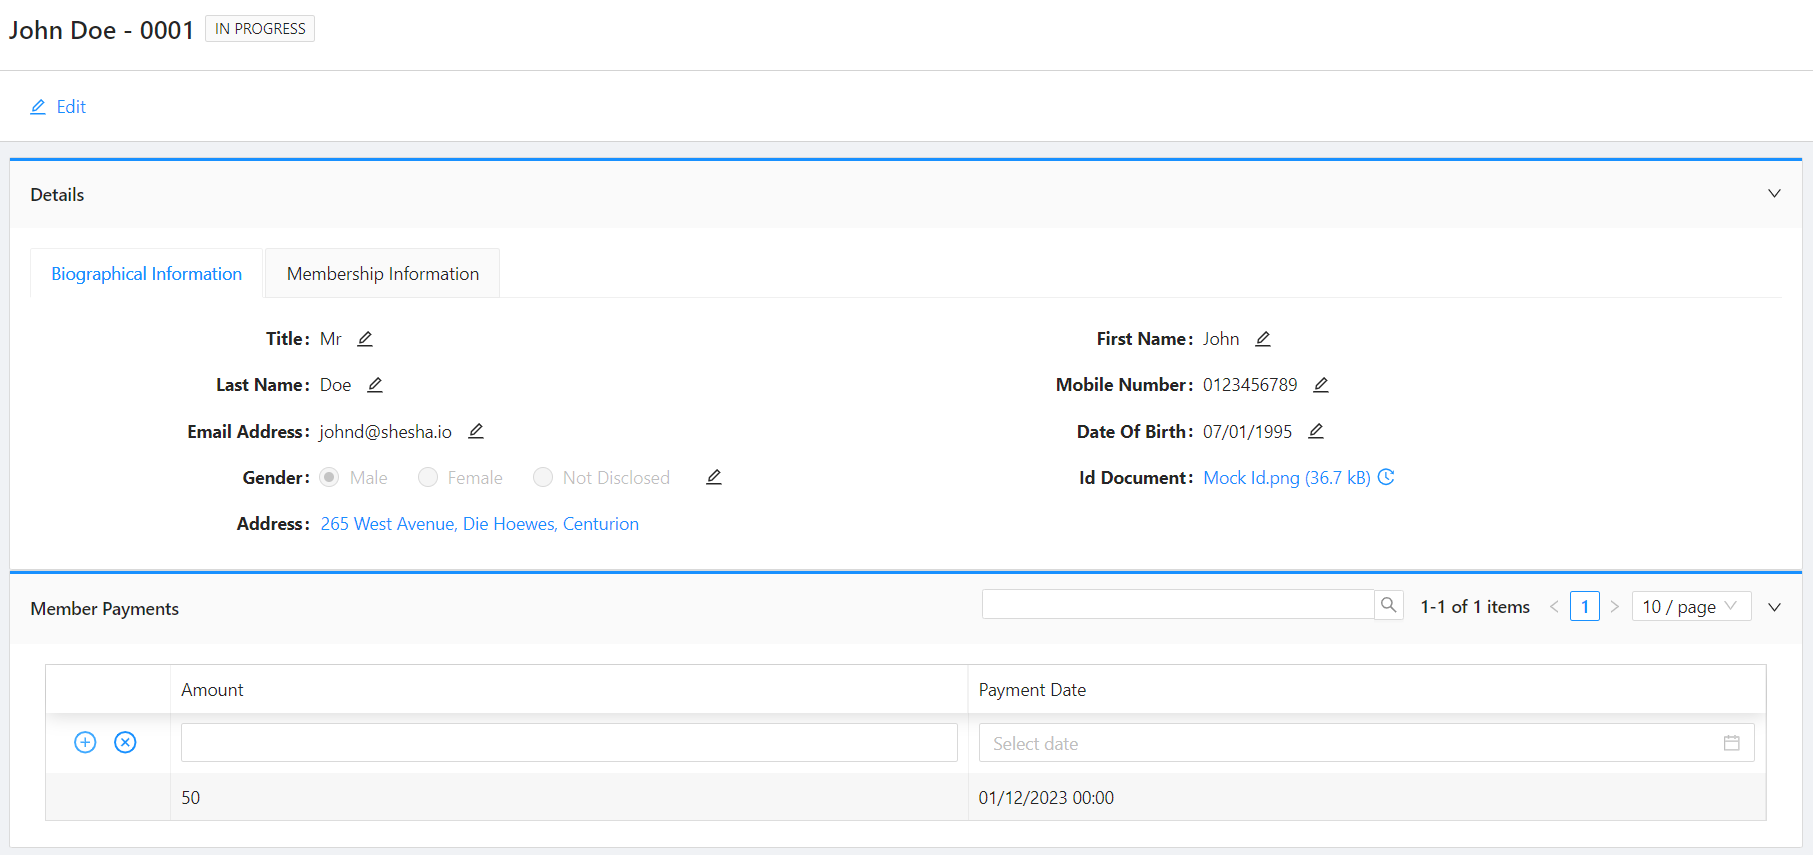
Test It
- From the main menu, navigate to the members-table and refresh.
- Drill down into the details view of any member.
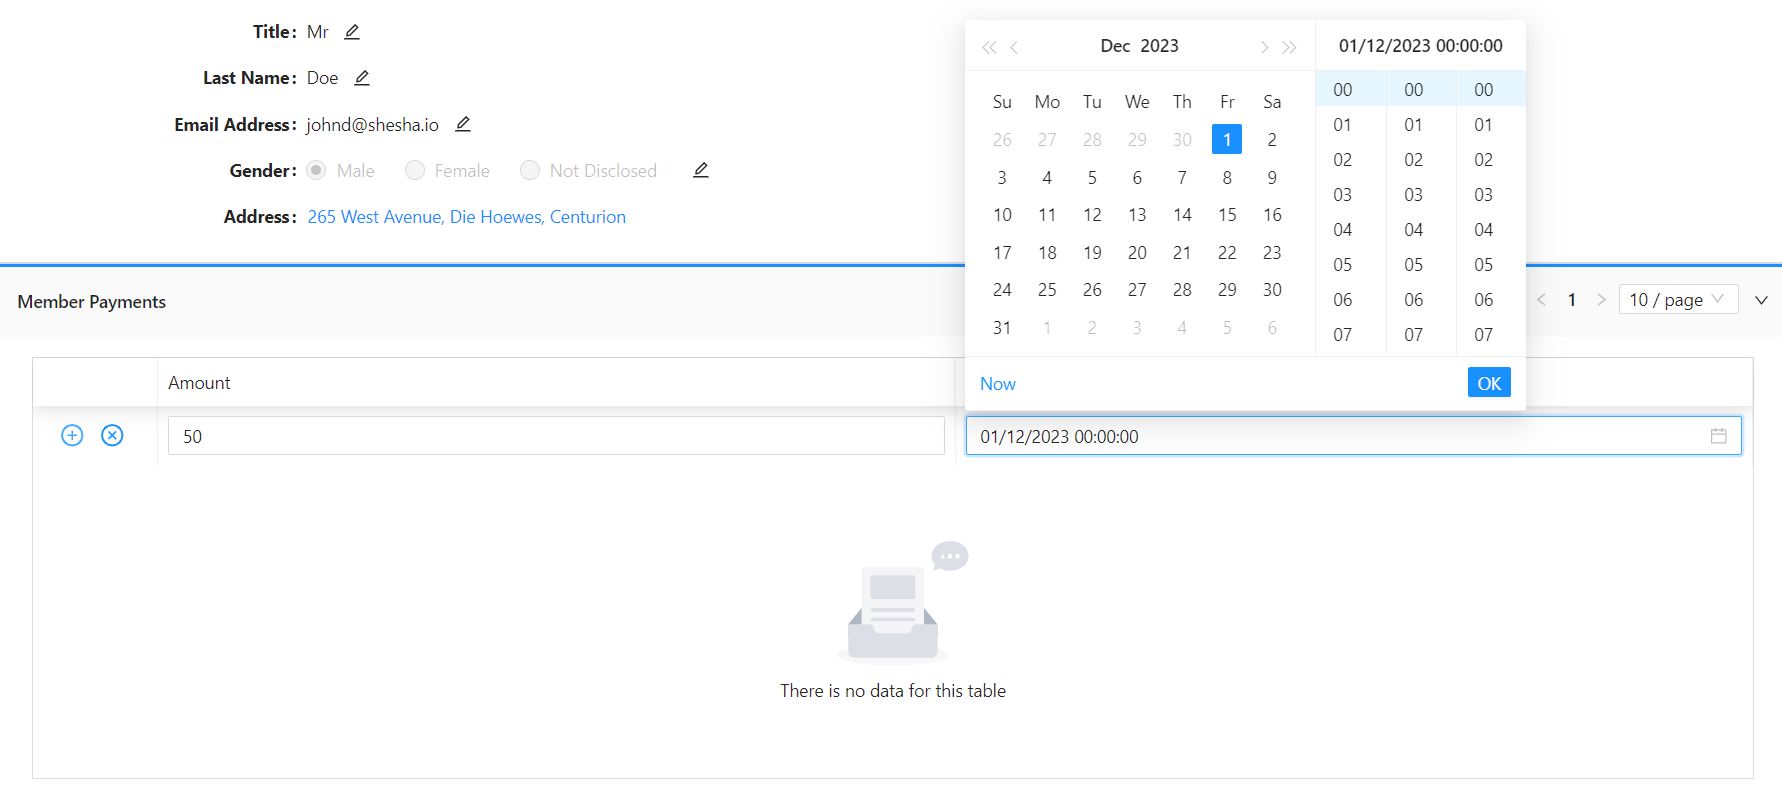
- Add a Membership Payment using inline editing.
Next Step
Continue with Custom APIs to build a custom app service that enforces business rules before activating a membership.