User Management
Understanding Person and User Entities
Shesha comes with both Person and User entities as part of its core domain model, and it is important to understand the difference and relationship between both. Whereas the Person entity is used to store and manage information relating to persons (whether the Person is a system user or not), the User entity is specifically used to manage system users.
In order for a person to be a system user, both a Person entity and a matching User record need to exist.
Since the information a system needs to store about a person will often differ depending on the requirements, it is expected that in most implementations, the Person entity will be extended by creating sub-classes with additional properties.
In contrast, since the User entity is used purely for managing the system accounts, it is not expected to be extended, as the framework should already provide all the necessary account management features required (e.g., creation, password management, lock-out, activation, etc...) via the UserManager class.
Example
Imagine you are building a system used to manage client information but where only company employees should have access to the system.
Since both Clients and Employees are more specific types of persons, you would create Client and Employee sub-classes that inherit from the Person class and add the relevant properties to each. You would, however, only create matching User records for the Employee entities.
Should you in the future want to create a client portal so that your clients can also access some limited functions of your system, you could then create User records for them as they register onto the portal. You would limit their access to certain functions only by assigning them different roles than you would for your internal employees.
Shesha User Management Endpoint
Shesha comes preloaded with a User Management endpoint, which manages the users of the system using both the Person and User entities.
In the cases where you want to extend the Person entity to make it more tailored to your application needs, here is a sample User Management endpoint that can be adapted:
Health Information System Example
In the example below, we have a Health Information System, where the majority of system users are Healthcare Practitioners for whom it is important to also track additional information such as Speciality, Medical Qualifications, etc... To support this, a Practitioner class that inherits and extends the Person class with the appropriate properties would be created.
public class HealthPractitioner : Person
{
    public virtual RefListSpeciality Speciality { get; set; }

    public virtual List<Qualification> Qualifications { get; set; }
}
Custom User Creation
As a new Healthcare Practitioner gets created in the system, it could be important to perform additional validation logic and create the matching User record so that they immediately have access to the system. One could implement this through a custom application service as illustrated below.
/// <summary>
/// Extending the default Crud AppService with a couple of User management related end-points.
/// </summary>
[AbpAuthorize]
[ApiVersion("1")]
[Route("api/v{version:apiVersion}/Common/[controller]")]
public class HealthPractitionerAppService : DynamicCrudAppService<HisPractitioner, DynamicDto<HealthPractitioner, Guid>, Guid>, ITransientDependency
{
    IRepository<HealthPractitioner, Guid> _repository;

    public HealthPractitionerAppService(IRepository<HealthPractitioner, Guid> repository) : base(repository)
    {
        _repository = repository;
    }

    [HttpPost, Route("CreateWithUserAccount")]
    [AbpAuthorize(CommonPermissions.UserManagement.Create)]
    public async Task<DynamicDto<HisPractitioner, Guid>> CreateWithUserAccountAsync(CreatePersonAccountDto input)
    {
        // Performing additional validations
        var validationResults = new List<ValidationResult>();

        if (input.TypeOfAccount == null)
            validationResults.Add(new ValidationResult("Type of account is mandatory"));

        if (string.IsNullOrWhiteSpace(input.FirstName))
            validationResults.Add(new ValidationResult("First Name is mandatory"));
        if (string.IsNullOrWhiteSpace(input.LastName))
            validationResults.Add(new ValidationResult("Last Name is mandatory"));

        // email and mobile number must be unique
        if (await MobileNoAlreadyInUse(input.MobileNumber, null))
            validationResults.Add(new ValidationResult("Specified mobile number already used by another person"));
        if (await EmailAlreadyInUse(input.EmailAddress, null))
            validationResults.Add(new ValidationResult("Specified email already used by another person"));

        if (validationResults.Any())
            throw new AbpValidationException("Please correct the errors and try again", validationResults);

        // Creating User Account to enable login into the application
        var userManager = IocManager.Resolve<UserManager>();
        User user = await userManager.CreateUser(
                input.UserName,
                input.TypeOfAccount?.ItemValue == (long)RefListTypeOfAccount.SQL,
                input.Password,
                input.PasswordConfirmation,
                input.FirstName,
                input.LastName,
                input.MobileNumber,
                input.EmailAddress);

        // Creating Person entity
        var practitioner = new HealthPractitioner()
        {
            FirstName = input.FirstName,
            LastName = input.LastName,
            MobileNumber1 = input.MobileNumber,
            EmailAddress1 = input.EmailAddress,
            User = user,
        };

        await _repository.InsertAsync(practitioner);

        CurrentUnitOfWork.SaveChanges();

        return await this.MapToDynamicDtoAsync<HealthPractitioner, Guid>(practitioner);
    }

    // ... (Continuation of the class, including helper methods)
}
Frontend Implementation
To manage users in the frontend:
- Access the
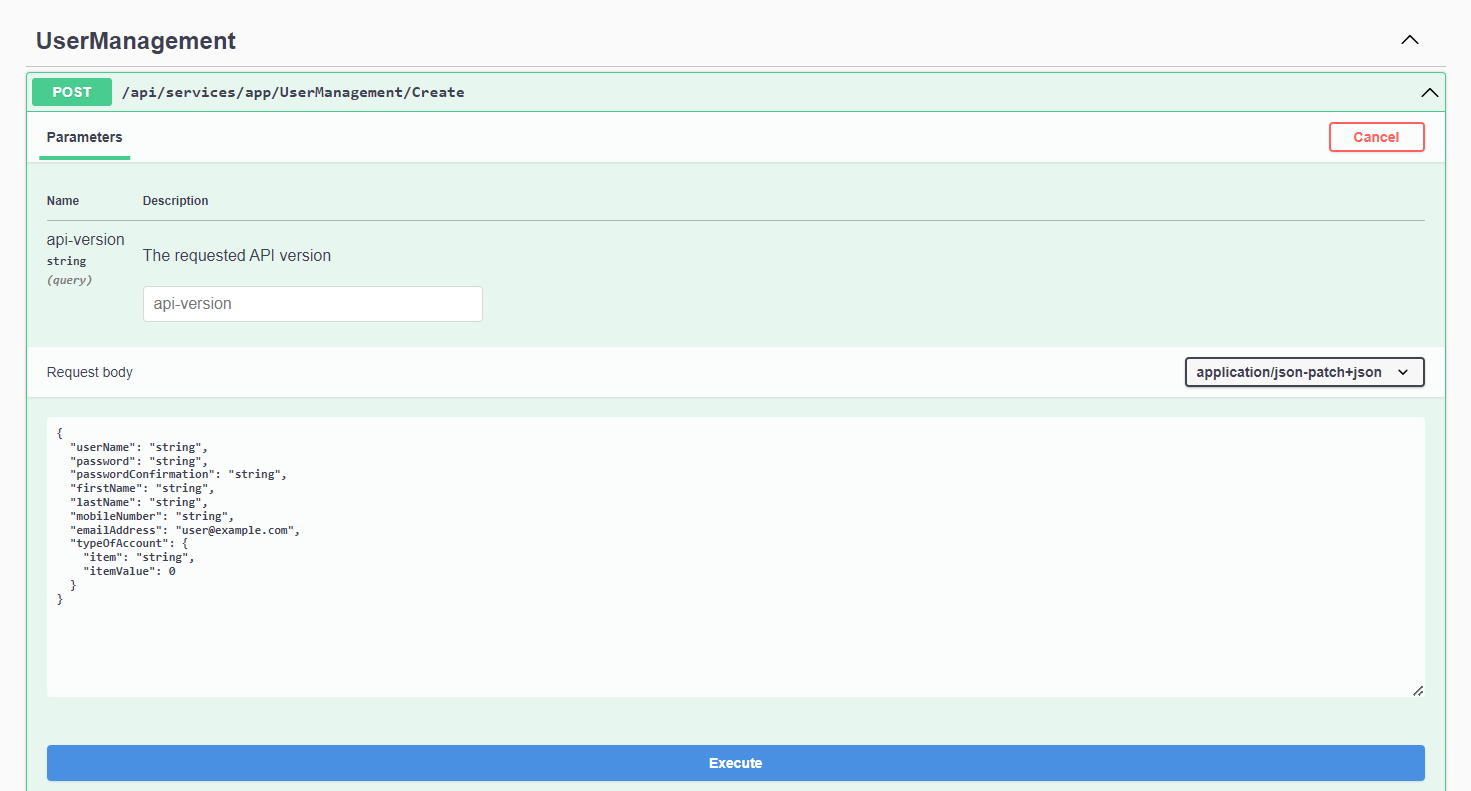
User Managementfrom the Administration main menu, click onRegister New User. - In the cases where a
Custom Enpointhas been created instead of using the default/api/services/app/UserManagement/Createthat comes with Shesha:- Navigate to the
Form Designerof theuser-createform - Drag and Drop the addition properties needed as part of the payload
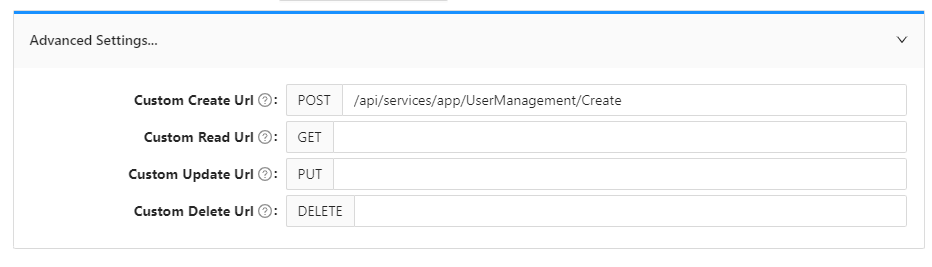
- Select
Settings - Replace the
Custom Create Urlwith the Url of your new endpoint
- Navigate to the
Assigning Roles
This can be achieved in 2 different ways:
-
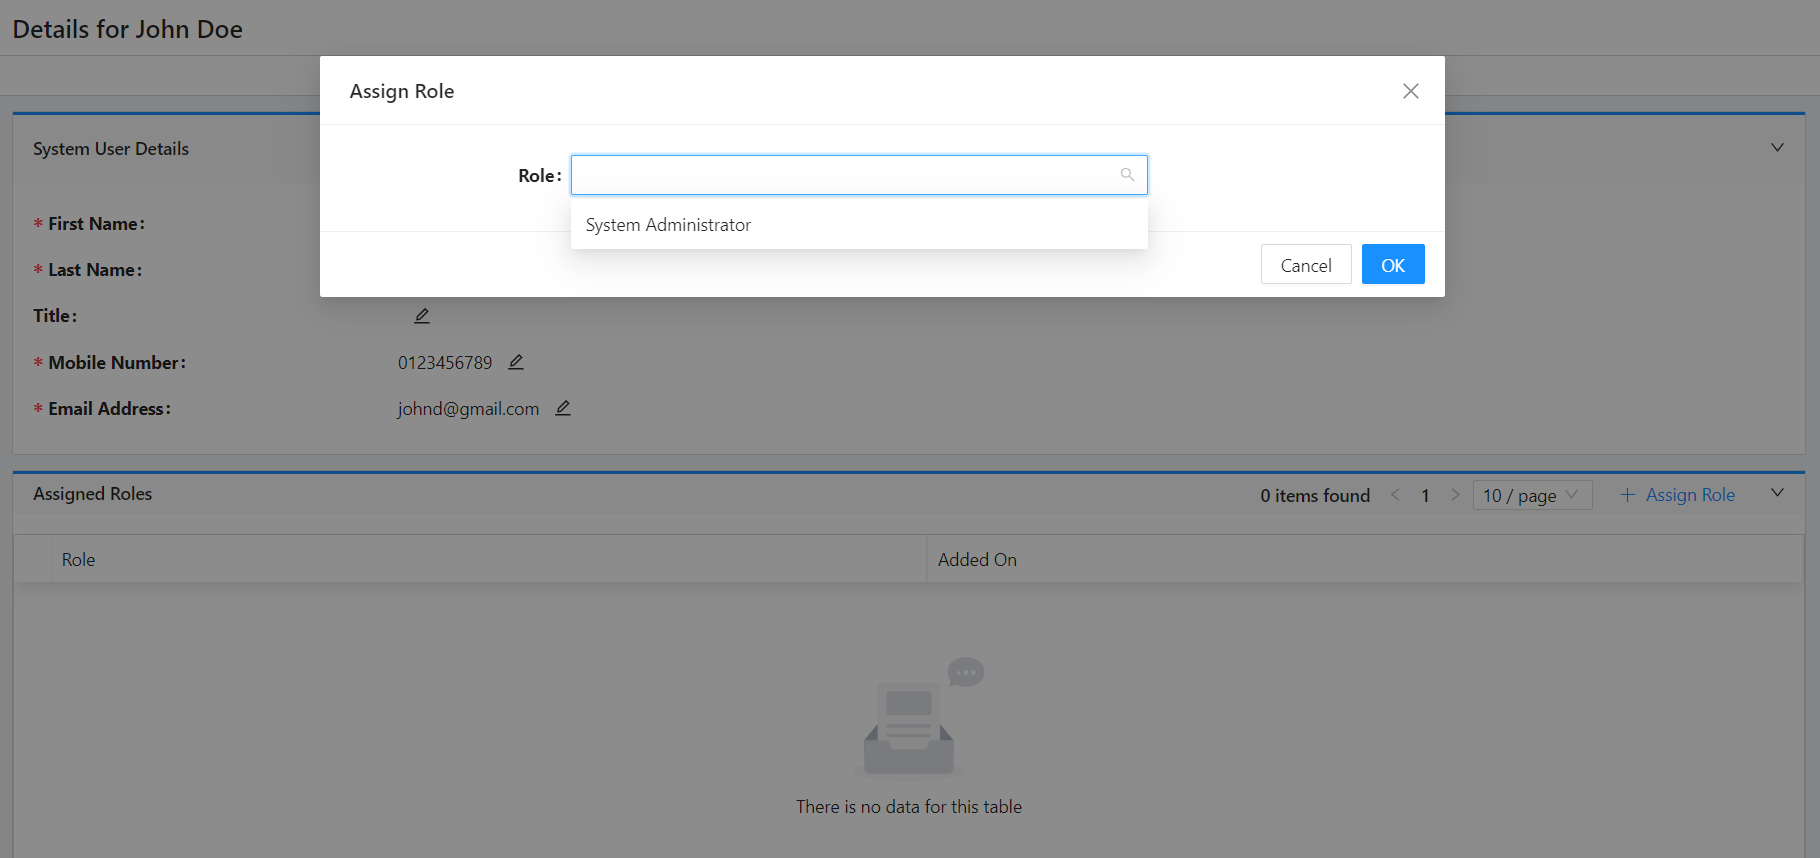
Access the
User Managementfrom the Administration main menu:- Navigate into the details view of the user you would like to assign a role.
- Click on
Assign Rolechild table button. - Search and select the appropriate role from the dropdown.
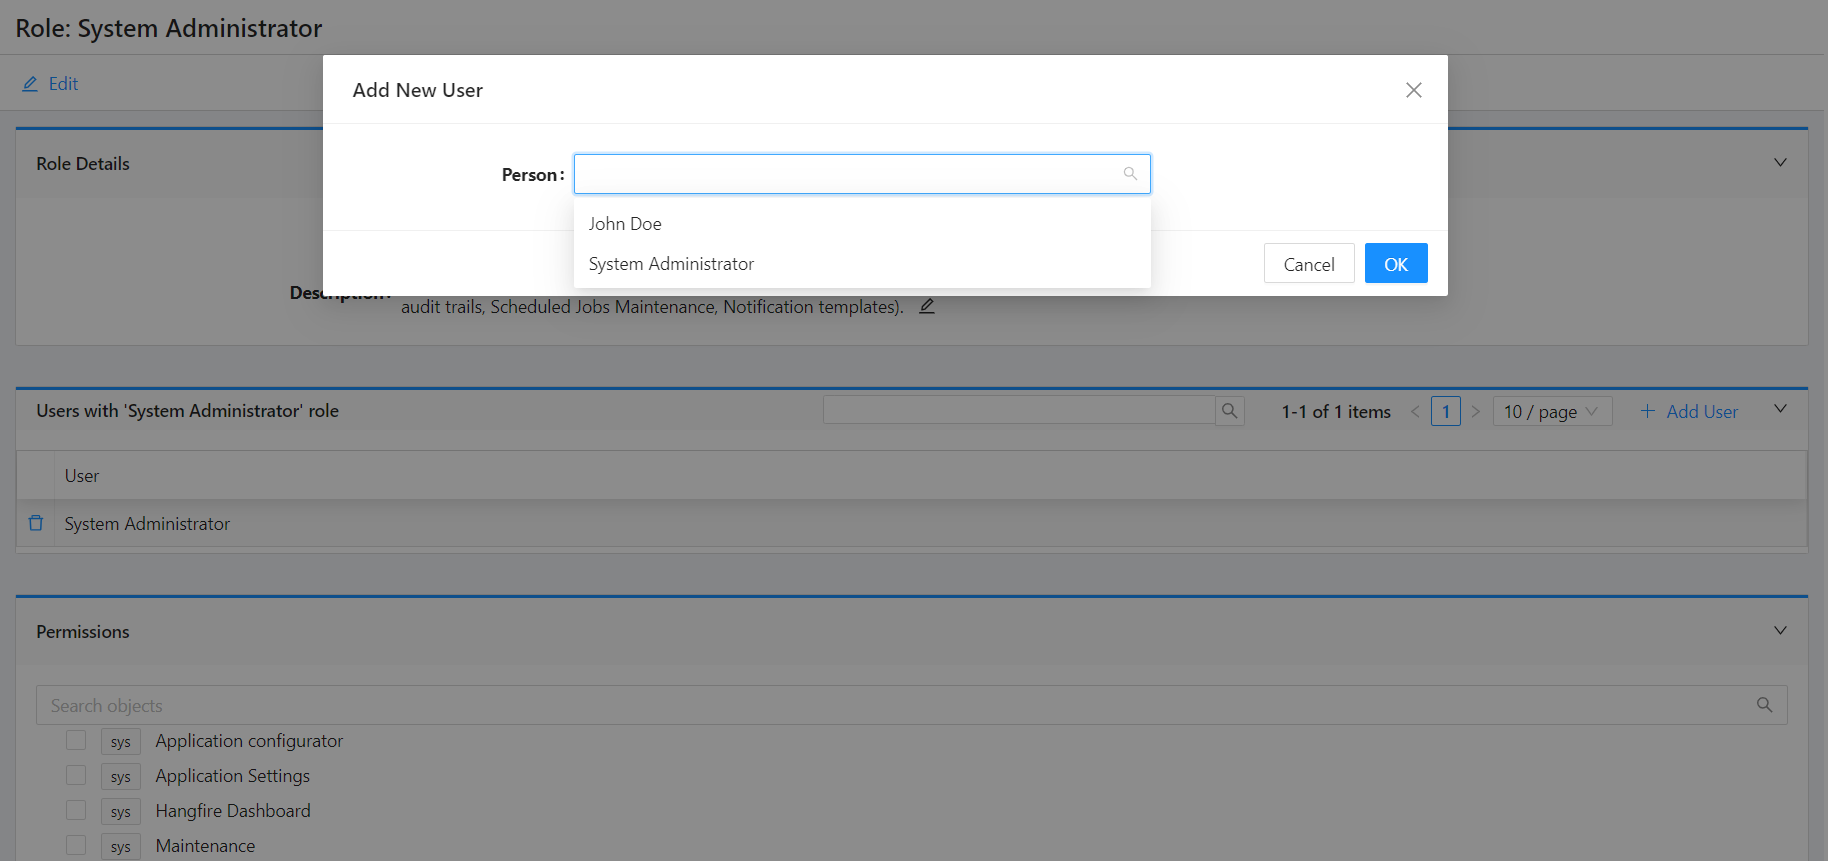
- Access the
Rolesfrom the Administration main menu:- Navigate into the details view of the role you would like to assign users to
- Click on
Add Userchild table button. - Search and select the appropriate user from the dropdown.